Look, let’s be real for a second. If you’re hunting down a Zelda Breath of the Wild walkthrough shrines guide, you’re probably either missing that one annoying shrine hidden behind a destructible wall or you’re staring at a "Major Test of Strength" wondering why your Guardian Sword just shattered into a million pieces. It happens to everyone. Even after years of playing, the sheer scale of Hyrule makes it easy to walk right past a Sheikah pedestal without noticing the faint orange glow buried in the grass.
Hyrule is massive. Learn more on a connected issue: this related article.
Actually, it's bigger than massive—it’s 120 unique puzzles scattered across a map that actively tries to kill you with lightning storms and Lynels. You don't just "complete" them. You survive them. Some are simple logic puzzles. Others require you to manipulate physics in ways that feel like you're breaking the game.
Why Finding Every Zelda Breath of the Wild Walkthrough Shrines Location Is So Hard
The difficulty isn't just the puzzles themselves; it’s the geography. Nintendo didn't just place shrines in open fields. They tucked them behind waterfalls, buried them under snowdrifts in the Hebra Mountains, and locked them behind "Shrine Quests" that require you to interpret cryptic riddles from a giant bird playing an accordion. Further journalism by The New York Times highlights comparable perspectives on the subject.
Kass is great, but his songs are basically riddles for "stand here at noon and shoot an arrow at the sun."
Most players hit a wall around the 80-shrine mark. That’s when the obvious ones—the ones visible from the towers—are all gone. Now you’re left with the tricky stuff. Like the Twin Memories shrines on Dueling Peaks. If you don't realize those two shrines are literally the key to each other, you'll spend three hours moving orbs around for nothing. You have to look at the pattern in one shrine to solve the other. It’s brilliant, but honestly, it’s kind of a jerk move if you aren't paying attention.
The Physics Engine is Your Best Friend (and Worst Enemy)
Breath of the Wild uses a "chemistry engine." This means fire, ice, electricity, and wind all interact.
You can solve a shrine the "intended" way, or you can do what most speedrunners do and just launch yourself across the room using a Stasis launch. I’ve seen people use Octo Balloons to lift platforms or create makeshift bridges out of discarded metal shields during electricity puzzles. If it works, it’s not cheating. It's just Hyrule.
Take the Mirro Shaz Shrine. You have to hit a sphere with just enough force to land it in a socket. Hit it too hard? It flies off into the abyss. Hit it too soft? It rolls back to your feet. It’s basically cosmic mini-golf. Most walkthroughs will tell you to hit it exactly five times with a sledgehammer and then once with a lighter weapon. That’s the kind of precision that makes or breaks your spirit.
Navigating the Most Infamous Shrine Quests
Some of the best content in the game isn't even inside the shrines. It’s getting them to appear.
The Eventide Island quest (Korgu Chideh Shrine) is a rite of passage. You land on the beach, and the game effectively says, "Nice armor you got there. Give it back." You’re stripped of everything. No food, no weapons, no pants. You have to scavenge for crabs and rusty broadswords just to survive against a Hinox. It changes the game from a power fantasy into a survival horror experience in three seconds flat.
Then there’s the Thyphlo Ruins.
Total darkness. You’re wandering around with a torch, seeing maybe three feet in front of you. You hear footsteps. Is it a Hinox? A wolf? Just a bird? You don’t know. This is where the Sheikah Sensor+ becomes mandatory. If you haven't upgraded your slate at the Hateno Ancient Tech Lab, do it now. Symin and Purah might be eccentric, but that sensor upgrade saves you from wandering aimlessly in the dark for forty minutes.
The Combat Trials: Gear Check or Skill Check?
Let's talk about the "Test of Strength" shrines.
- Minor: A breeze. You can probably beat these with a soup ladle.
- Modest: Requires some actual dodging and maybe a decent bow.
- Major: These are the gear-check gates.
If you walk into a Major Test of Strength with 4 hearts and a Boko Club, you’re going to have a bad time. These Guardians have massive HP pools. The trick isn't just hitting them; it's using the environment. If there’s water on the floor, use Cryonis to create a pillar to block their spin attack. If the floor is metal, use Magnesis to lift a chest and bash them with it.
Shock arrows are also a literal lifesaver. They stun the Guardian, giving you a three-second window to whale on them with your best Ancient Battle Axe+.
Hidden Gems and the "Impossible" Shrines
The Hebra Mountains are the absolute worst for shrine hunting. Everything looks the same—white snow and gray rocks. There’s a shrine hidden behind a massive stone door at the bottom of a hill. You can’t just pull it open. You have to go way up the hill, find a snowball, and roll it down so it grows big enough to smash the door.
Who thinks of that naturally?
And don't get me started on the Keo Ruug Shrine inside the Great Hyrule Forest. The "Fatal Stars" puzzle. You have to look at the constellations on the wall and count how many times they appear at the end of the rows. It’s subtle. It’s quiet. It’s the kind of thing that makes you feel like a genius when you finally hear that "puzzle solved" chime.
Dealing with Motion Control Puzzles (The Apparatus)
We have to address the elephant in the room: the gyro puzzles.
You know the ones. You have to tilt your Nintendo Switch or Controller to move a giant hammer or navigate a ball through a maze. They are widely considered the most frustrating part of any Zelda Breath of the Wild walkthrough shrines journey.
Pro tip: For the maze ones, like the Myahm Agana Shrine in Hateno Village, just flip your controller upside down. The bottom of the maze is usually a flat surface. The ball will land on the flat bottom, and you can just flick it into the goal without dealing with the walls of the maze. It feels like a crime, but it saves your sanity.
Maxing Out Your Stats: Hearts vs. Stamina
Every four Spirit Orbs you get from shrines lets you pray to a Goddess Statue for a container.
A lot of people rush for the Master Sword, which requires 13 red hearts. That’s roughly 40 shrines worth of orbs if you don't put anything into stamina. But honestly? Stamina is more important for exploration. You can always cook "Hearty" foods (like Hearty Durians or Hearty Truffles) to give yourself temporary yellow hearts. You can't "fake" stamina as easily when you're halfway up a cliff in a rainstorm.
Get two full wheels of stamina first. Then focus on the hearts.
If you mess up, there’s a "Cursed Statue" in Firly Pond (Hateno Village) that will let you swap hearts for stamina for a small fee. He’s a bit creepy, but he’s the only respec mechanic in the game. Use him.
Actionable Steps for Your Shrine Hunt
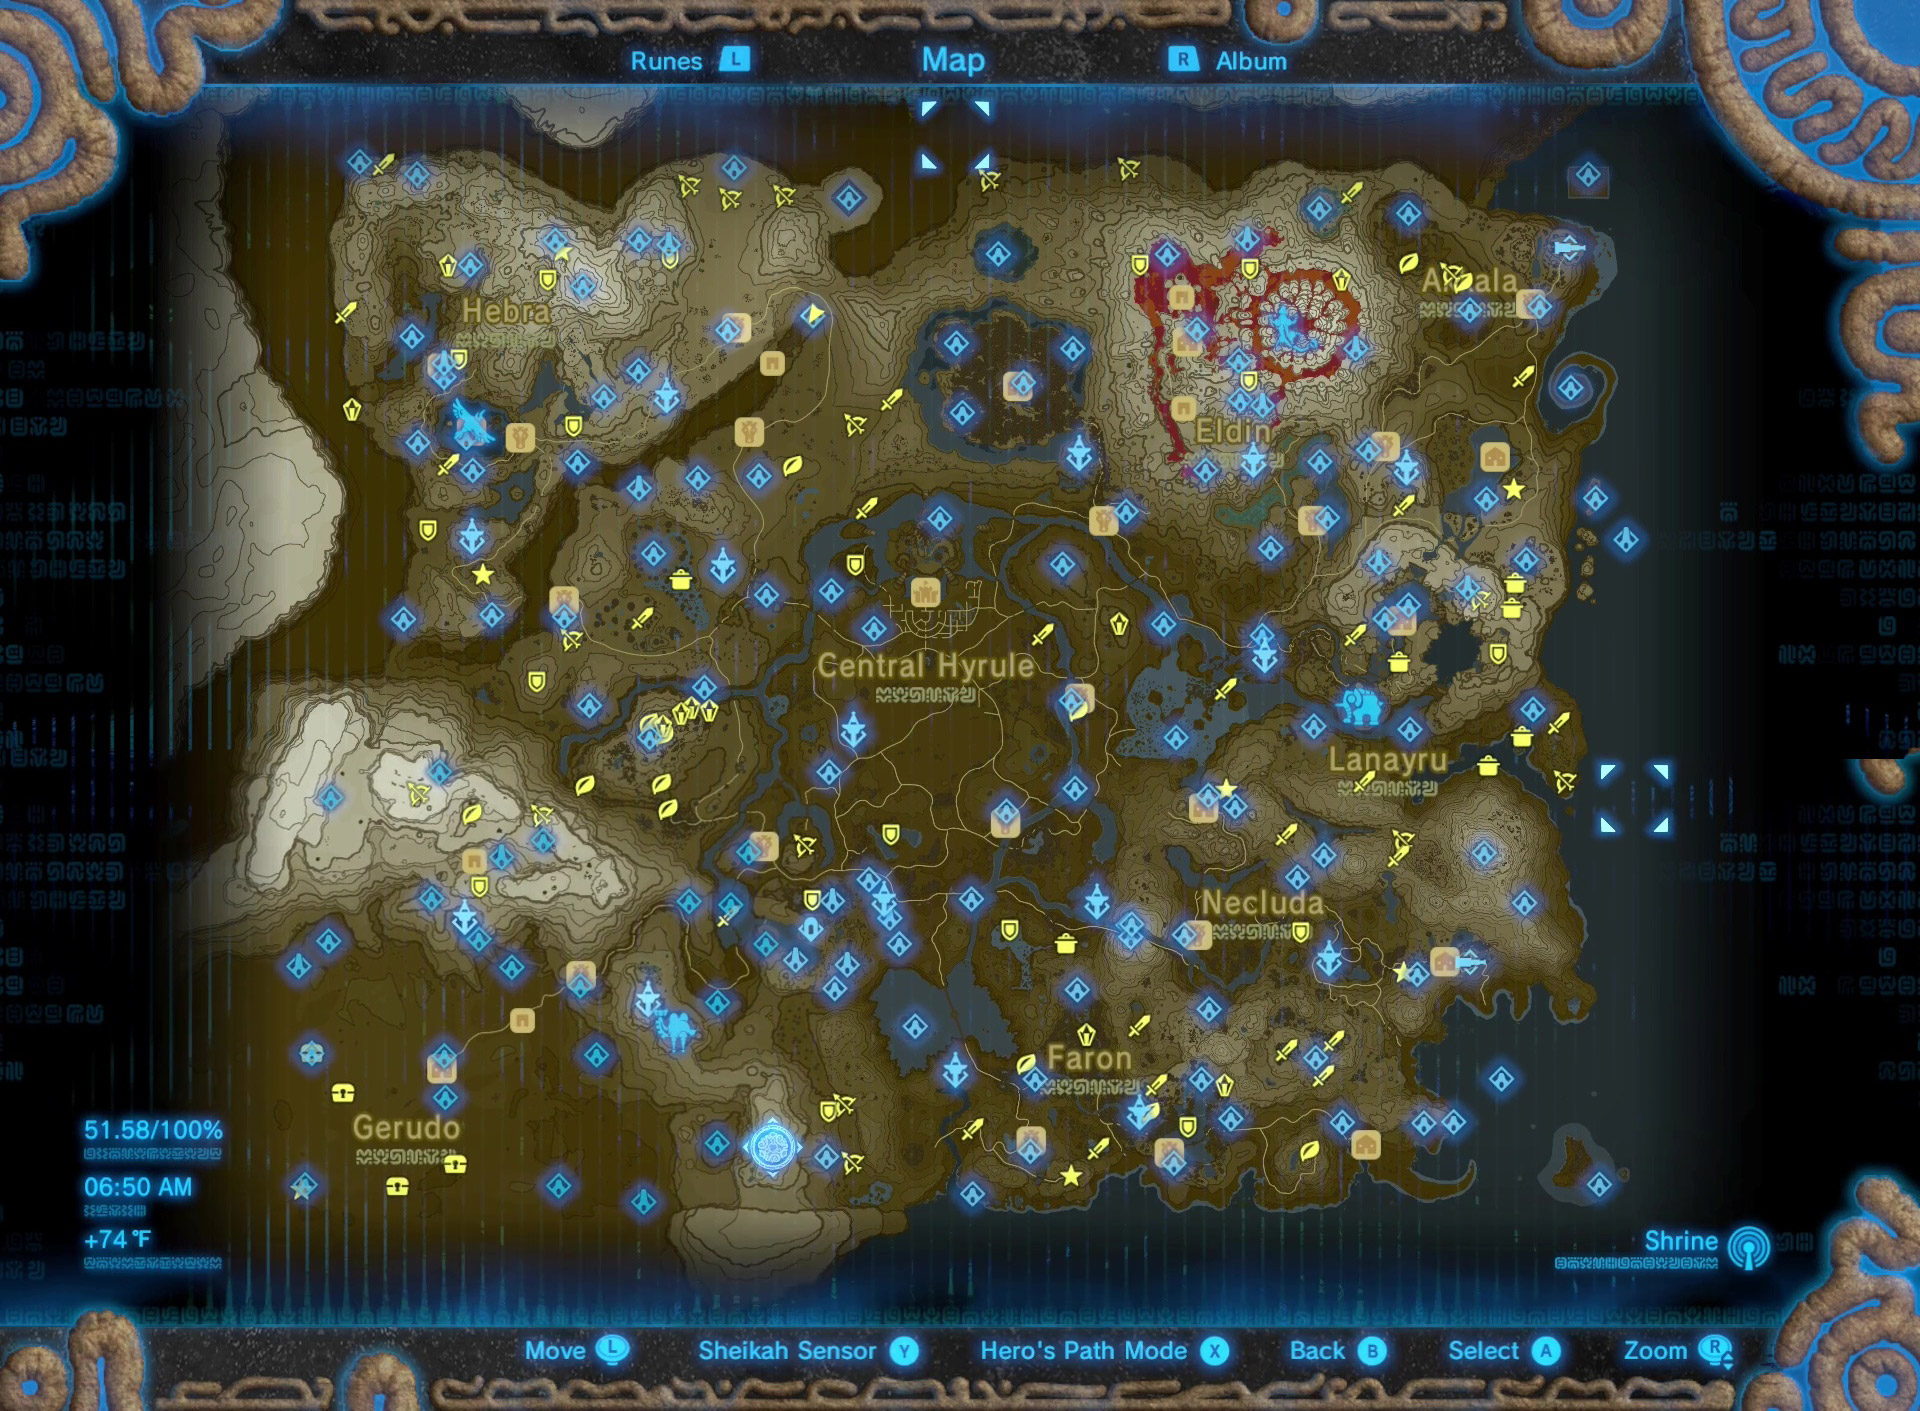
If you're stuck at 119 shrines and losing your mind, follow this exact checklist. Don't just wander. Hyrule is too big for "vibes" once you're in the endgame.
- Check the "Completed" Icons: Look at your map. If a shrine icon is orange in the middle but blue on the outside, you found it but didn't finish it. If it has a little chest icon next to the name, it means you found every hidden chest inside.
- Talk to Every NPC with a Red "!" Mark: Many shrines won't even appear until you trigger their specific quest. Check the stables especially.
- Use the Hero’s Path Mode: If you have the DLC, turn on the green line that shows where you’ve walked. Look for the giant empty gaps on your map. If you haven't walked there, there's probably a shrine there.
- Listen for the Beep: Set your Sheikah Sensor specifically to "Shrine" and just run. If the beep gets faster, you’re getting warmer. If it stops, look up or down. A lot of shrines are in caves beneath you.
- The Blood Moon Reset: If you’re doing the "Under a Red Moon" quest (Mijah Roke Shrine), don't just wait around. Go kill enemies to force a Blood Moon to happen faster. When the sky starts turning purple, strip Link naked and stand on the pedestal. Yes, really.
The reward for all 120 is the Outfit of the Wild. It’s the classic green tunic. It’s not the best armor in the game statistically, but the nostalgia hit is worth the 100+ hours of puzzle-solving. Plus, it makes you look like a proper hero instead of a guy wearing a rubber fish suit (though the Zora armor is admittedly great for swimming).
Go get those orbs. Hyrule isn't going to save itself, and Zelda has been waiting in that castle for a century. She can wait another twenty minutes while you finish one last puzzle.
Practical Resource Checklist:
- Hateno Lab: Upgrade the sensor immediately.
- Cooking: 5x Hearty Durians = +20 temporary hearts.
- Stamina: 1x Endura Carrot = Full stamina refill plus extra.
- Combat: Use "Stasis+" on enemies to freeze them in place for easy hits.